Spring Into Your Decor!

Springtime is nesting time! I wanted to share my budget friendly fireplace mantle display I had a lot of fun creating.

32805313_1641129562608797_1506662239535366144_n

Spring is by far my favourite season and after this long Canadian winter, it could not have come soon enough! We recently did a family room renovation so it was the perfect time for some new Springtime decorating. I love decorating on a dime and thrift store shopping is becoming my most enjoyable pastime.

32489695_1641129859275434_4714681073647222784_n

I found this beauty at Value Village for $24.99 and loved the frame just the way it was so I did not even paint it, I just gave it a wash. The print was on a hard cardboard so it did not have too much texture which was great. I had to add a couple of nails to secure the picture more at the back.32815095_1641129729275447_5678911651189882880_n

At Michael`s I bought black chalk paint and did 2 coats on the painting with a brush.

32810456_1641129705942116_5395368359963394048_n

The candle sticks I found at Value Village on a separate visit for only $7.99 and again, all I had to do was wash them as I liked the wood. The boxwood topiary balls were at Dollarama for only $3 each. The wreath I ordered from Amazon and it was around $16.

I hope to change this display for each season or holiday and plan to practice more chalkboard art to improve my skill there 🙂

I hope this gives some inspiration to put a little Spring in your decor!

Thank you for stopping by,

Melanie.

China Cabinet Makeover Story

23559725_1465037170218038_4166778694802535261_n

It has been my plan to make over my dining room cabinet, especially since I gave my table and chairs a new look a few years ago. As you can see, with so much glass on this 90’s cabinet, I thought this project would require a lot of time so I put it off.

I am happy to share that I finally did it! I wanted to describe the process for you and show the final result to inspire you to redo that piece of furniture you know you have been wanting to update!

I did this project in stages and worked on it when I had time. Stage one was emptying it (I can’t believe how much I had in there!) and taping the glass. I had a wide painters tape and decided to make squares so I could tape the corners more efficiently and it worked well. I think I did about 48!

23561381_1465036880218067_1669319625376323129_n

After a good cleaning and a very light sanding (mostly to remove residue) with a 220 sandpaper I was ready for paint. I decided to use chalk paint and bought Artminds chalk paint in the colour ‘porcelain’.I was impressed with the coverage and how little paint I needed. The picture above was after the first coat. I did a second coat and at the end I watered down some of the same colour to give it just a light third coat; this saved me paint and it worked well.

After the painting was complete it was time to work on the back face of the cabinet. My inspiration for the look came from something I saw on pinterest from hometalk. I like the farmhouse style with some rustic charm.

My cabinet had mirror at the back of the outer sections and I wanted the back to look consistent. I used pine wood panelling that I found at Rona for a very good price and my husband cut them to length for me. We fit and taped the back of the boards together and I stained the pieces with Minwax Espresso. I wanted a more rustic look so I brushed on some watered down grey latex paint and used a damp rag to rub it in. To protect and seal the wood, I brushed on 2 coats of Varathane water based wood finish in satin. After the varathane, the grey washed look was toned down but I still liked the look.

We used a construction adhesive to glue the panels to the back of the cabinet. Now all I had to do was complete the distressing; I used 220 grit wet sandpaper (to cut down on the dust) and only distressed the edges and details; I did not want a ‘chippy’ look.

23517989_1465036843551404_3499592582864225488_n

We had to get the inside glass shelves cut to fit now that the wood was at the back so a local glass shop did that for us and it only cost 40 dollars. I decided to stencil a detail on the drawers and used furniture wax to finish the piece. The handles were spray painted in a matte black.

23518976_1465036786884743_1697364570903188473_n23559455_1465036753551413_6311055394449991444_n

I love my new cabinet and I used many supplies I already had on hand so other than the glass cutting, the cost was only about 35 dollars.

23722251_1468944376493984_3190591523912012340_n23519179_1465036630218092_3164932798735815685_n23472239_1465036656884756_26841293919122187_n23622294_1468944416493980_8568608553654804699_n

I have to give a big shout out to my hubby who helped me with this project!

Thank you for stopping by, please do not hesitate to comment or ask questions.

Have a beautiful day!

Melanie.

Motivation: A Word of Encouragement!

I am in the middle of trying to catch up on 11 years of scrap-booking for 3 children and boy am I tired! How on earth am I going to get this done? I thought this was a good time to discuss motivation. (I also welcome any ideas on how to do scrapbook pages quickly!)

I have the amazing opportunity to teach what I love. The word amazing can get thrown around a bit too much; but it fits here. Even though I love what I do, I can be in need of motivation on some days and I find that my students can need it quite a lot.

I had a student ask another one, ‘how do you get motivated?’ and it made me think. There certainly are quite a few quotes or platitudes we can post or share and I do love many of them, but they do not actually get us moving.  For me, I have discovered that when I feel a bit melancholy it is usually because I am not working towards a goal or living out my purpose. I believe it can take a lifetime to discover your purpose but finding out what excites you is a great place to begin. What makes you happy? What activity do you enjoy? When do you feel accomplished?

My mother always says that she sets goals every day and works to complete them; I do find that this can work well. (Yep, mom was right!). You can write goals down on paper, put them in your phone, or just keep a mental note; each day you may use a different method depending on what works best. Do not beat yourself up if you do not complete every goal; as Scarlett O’Hara says, ‘after all, tomorrow is another day.’ 🙂

Trying to get motivated on something you do not want to do but have to do is quite different. In this case, I suggest you keep your ‘eyes on the prize’ so to speak. Remind yourself why you need to complete this project. What is the long term goal? How does it benefit you? Will it benefit someone else? Try to focus on the bigger picture, then tackle the ‘to-do’ list in order of importance (or due date!) For my scrapbooks, my motivation is how much joy I get visiting beautiful memories and knowing they will be an heirloom for my children to keep and share with loved ones.

In conclusion, I want to encourage you to keep doing what you love, discovering what excites you and being creative in some way.  (And if you do not mind, please wish me luck with my ‘summer of scrap-booking’) 🙂

20292830_1373021339419622_935020063236258304_n

This is the scrapbook page I just completed; so many more to go!

Have a beautiful day!

Melanie.


Simple Beauty With Spring Gardens.

Spring is my favourite season by far; I can even put up with the sneezing and mosquito bites just to see creation come alive again. I do not always have a green thumb (I may or may not have killed a cactus) but I keep working at it and mistakes can be the best teachers.

I prefer perennials in my flower beds as they are low maintenance and easy for lazy gardeners like me.  We can have dry summers and I love plants that are drought resistant; most perennials do not need watering like annuals do and some do not need much direct sunlight either which is great for shady areas by the house.

I wanted to share pictures of my surroundings this Spring and some of the low maintenance plants I love!

18951199_1323196901068733_4378278438423050507_n

Lilac:  the scent of Spring.

Lilac is a sure sign of Spring! I always enjoy the look and scent of the lilacs growing in gardens or on the side of a country road.


18882139_1323196057735484_8323683349066179881_n

Candelabra planter for annuals.

I plant annuals in pots for some consistent colour among the perennials. I found this candelabra at a thrift store; this year I decided to put it to use as a planter.


18881757_1323196624402094_4697809796090714962_n

“Snow-In-Summer”  I love the silver foliage and abundance of flowers.

The ‘snow in summer’ has been a delight in my garden. This hearty perennial is easy to control and grows in sun or shade in my gardens. This plant stays quite low so it works well in rock gardens.


18920224_1323199044401852_9113794621212340524_n

Peony getting ready to bloom; can’t wait!

I was not sure if this peony would do well in my back garden but it sure has thrived and gets bigger each year. The ants are now busy working on the flower buds so I hope to see the large white flowers soon!


18892995_1323196827735407_6742999436929276547_n

Iris; she is a faithful Springtime friend.

Irises are wonderful because I find the bugs leave them alone and they are not too aggressive. I have mini irises also which are dark purple and bloom a bit later; Irises do not bloom for long, but they sure are pretty!


18893359_1323199114401845_1961092477822234476_n

Daisies; you never quite know where they may show up in Spring!

I grew daisies one year from seeds and now they re-seed just about anywhere! These ones popped up at the side of the yard where I threw out some old plants last year but I am glad they showed up! Daisies will last quite long if you cut them and put them in a vase inside so they are great to have in a garden.


Please share your Springtime garden stories or leave a comment for me.

Thank you for stopping by and have a beautiful day!

Melanie.

Create Your Own Outdoor Lamp.

solar lamp

I love how solar lights can brighten an outdoor space at night, especially when street lights are at a minimum and you arrive home in the dark. There are so many lovely solar lights available at stores but why not make one that is unique and fits into your own style and decor?

For this project, I wanted to find a lamp that could be placed at my front door so when we arrive home after dark there is some light. When you live in the country and you leave an outside light on by your door, you invite many moths to come inside with you so solar lamps are perfect!

I did not take a before picture of this lamp but it was just a simple brass lamp with no shade priced at $3 at a local thrift store. The final result took some thought but it did not take very long to create this beauty 🙂

I was not sure exactly how I would turn it into a solar lamp but then I found the glass globe on another trip to the thrift store for $1 and took it home to see if it could work. I went to a couple stores to find the right size solar light and Walmart had one for $8 (actually more money than I wanted to spend!) It sounds crazy, but when you shop at thrift stores, anything over $10 seems expensive 🙂

This lamp could also work well indoors with a battery operated candle or light.

Steps

  • I cleaned the lamp and painted 2 coats of Zinnser 123 primer
  • 3 coats of outdoor latex paint (the same blue as my front door)
  • distressed with sandpaper
  • 2 coats of clear spray paint
  • glued the glass globe on the lamp with E6000 adhesive and let dry overnight
  • placed the top of a solar light on and found a spot outside to enjoy it!

18767908_1322569584464798_1242389982272844767_n18893280_1322633827791707_8260984069987650738_n18920615_1322633781125045_2010260861940096791_n18951173_1321579024563854_7096871075714509905_n

This was actually the second lamp I did and I will share pictures of the first one soon. I welcome any comments or questions.

Thank you for stopping by and have a beautiful day!

Melanie.


How I Got Rid of Head Lice with Aromatherapy.

head lice

Head lice… just hearing those words can make your head itch. Head lice seems to be more of a problem today than it was when I was a child but I have had an experience with those little ‘buggers’ after coming home from a rented cottage; I was horrified! My children were getting lice from classmates in primary school years ago and I was determined to find a better way to get rid of them as I became frustrated with the drug store treatment when it did not even kill the bugs on my daughter’s head.

Aromatherapy is a passion of mine and I knew there had to be a better way so I did some research from my trusted sources such as Robert Tisserand, Eve Taylor and Salvatore Battaglia and I wanted to share the recipe that worked for me and my children.

First I want to say, I get very frustrated (angry even) with pinterest posts that make outrageous claims like ‘lemon juice and honey will get rid of wrinkles’ because natural is good, but it can only do so much. But I do want to tell you that this recipe along with a routine of ‘nit-picking’ and treating your bedding is a powerful weapon against head lice if you are diligent in all areas.

Essential oils useful for head lice are rosemary, lavender, geranium and eucalyptus. Everyone has been jumping on the ‘tea tree bandwagon’ when it comes to warding off head lice, but it has not been found as a useful oil in my research.

The base of the blend is mouthwash (any kind will work) and oil (again, use any kind you have in the house).

Head Lice recipe:

In a 5 oz (120 ml) bottle, mix the following:

  • 4 oz mouthwash
  • 1 oz oil
  • 5 drops lavender
  • 5 drops geranium
  • 5 drops eucalyptus
  • 5 drops rosemary

Shake this mixture and apply on dry hair, coating all of it. Wrap the head with plastic or a shower cap and leave for one hour. Shampoo to remove.

Continue to nit-pick and repeat this treatment every 5 days.

For small children or short hair you can cut the recipe in half.

This treatment feels cool on the scalp and does not irritate; it also smells great. Be careful by the eye area as it will sting if it gets into the eyes.

If you do not have all of the essential oils on hand, just use the ones you have and adjust the recipe drops to total 20. I welcome any questions or comments!

Thank you for stopping by and have a beautiful day 🙂

Melanie.


Simple beauty; the sky!

Copy of Copy of quote; beauty garden

Yes, it is true. I am that crazy ‘sky picture’ lady.

I have the privilege of living where I can see a full view of the beautiful sunrise right outside my back window. A sunrise or sunset’s full glory may only be revealed for seconds and I never tire of seeing that amazing sight.

I think my sky obsession began when I saw the sunset while staying at a cottage back in high school. I grew up in the city and could never observe the sky quite the way you see it setting over a lake.

My family teases me for all the ‘sky pictures’ I love to take but I have come to terms with my condition so why not share some of the beautiful ‘skies’ I find joy in capturing?

I hope you enjoy the view!

18739765_1314210721967351_1058908582778216922_n

Sunset; after a few days of rain in Southern Ontario, Canada.

18620284_1314210901967333_8961830408721743873_n

Backyard sunrise.

WP_20150726_011

Summer Blue Sky.

InstagramCapture_dfe35736-e949-419b-9930-e3826eeb7f07

Winter sun after an ice storm.

12141811_10208305128094149_7968364307260914683_n

Sunrise; travelling home from Myrtle Beach.

I would love to see your ‘sky’ pictures and find out if I am not alone in my obsession!

Thank you for stopping by and have a beautiful day.

Melanie.

Spotlight: What’s On My Skin?

When I open a tester product, I will do two things.

First I will turn the bottle around to look at the list of ingredients.

Second (if I can) I put some of the product the back of my hand. I instinctively massage the product on my skin to feel the texture, then I bring my hand up to my nose to take a sniff. Every single time!

As an esthetician, I focus on 2 main things when deciding to try or purchase a product.

Ingredients

What are the ingredients in the product? The product will only do what is says it will do if it has the correct ingredients (and enough of them) to accomplish that goal.

Performance

Is the product easy to use and does it feel good on my skin? Do I like the scent and would I enjoy using it?


The product I put on my skin today is a Fake Bake Flawless self-tan liquid. This has been a favourite of mine for quite a few years. I have tried many self tanning products and this one checks my boxes for ingredients and performance.

fake bake

The benefits I find this product has include:

  • simple ingredients
  • no preservatives or parabens
  • dries very quickly
  • non-greasy
  • streak free
  • comes with a mitt for application
  • a pleasant scent
  • goes on tinted for instant colour
  • the active tanning ingredient (dihydroxyacetone) is high on the list so it works well
  • no animal testing


You can buy this product as a salon/spa and also online stores.

Fake bake is also a spray tan treatment you can book at a spa or salon and this product can be used at home for touch ups.

I welcome any thoughts or comments. Thank you for stopping by and have a beautiful day!

Melanie.

Clay Pot Lighthouse; a how-to guide.

I am quickly becoming a Pinterest addict! This spa chick is not the most ‘crafty’ person but with a little inspiration and an understanding of my limited degree of talent, I can usually estimate which projects may be successful 🙂

With the gardening season around the corner and gifts to buy in the month of May, I felt inspired to get creative and wanted to share.

style sneakers

If you search ‘clay pot lighthouse’ on Pinterest you will see many styles created by talented people to give you some ideas.

Steps:

  1. I purchased the clay pots from Dollarama and found the solar light there as well; I had most of the paint at home already.
  2. I glued the 3 pots together using gorilla glue but I do not recommend that as it dripped and I had to remove that later. I suggest the E6000 adhesive.
  3. Zinnser bulls eye 1-2-3 primer (a favourite). 2 coats.
  4. One coat of white semi-gloss latex paint.
  5. Black acrylic craft paint for the trim.
  6. For the windows and door I used a sharpie permanent marker with a stencil and then painted inside the lines. (My years of painting nails came in handy here!)
  7. paint the top with red acrylic craft paint.
  8. A detail brush helped add craft paint to the windows and door.
  9. I glued the decorator stones with the E6000 adhesive, one row at a time starting at the bottom; this worked best so they do not slip while the glue sets. (I learned that by the second lighthouse!)
  10. I spray painted 2 coats of clear gloss.
  11. I attached the solar light with the E6000 adhesive.

Project Photos:

18447001_1306124932775930_8751392459020736478_n18446543_1306124886109268_7869296668359976878_n18447074_1306124816109275_9116911539080491640_n18447256_1306124626109294_2005626881095315754_n18446535_1306124782775945_1752490321232263529_n18486445_1306124732775950_5728839289797006951_n18447490_1306124332775990_1257512033315969249_n (1)

I had so much fun with this project and completed them over a few days, doing each step when I had time. I hope to make one to keep 🙂

Thank you for stopping by and have a beautiful day!

Melanie.

Spa Safety Checklist For Your Next Treatment

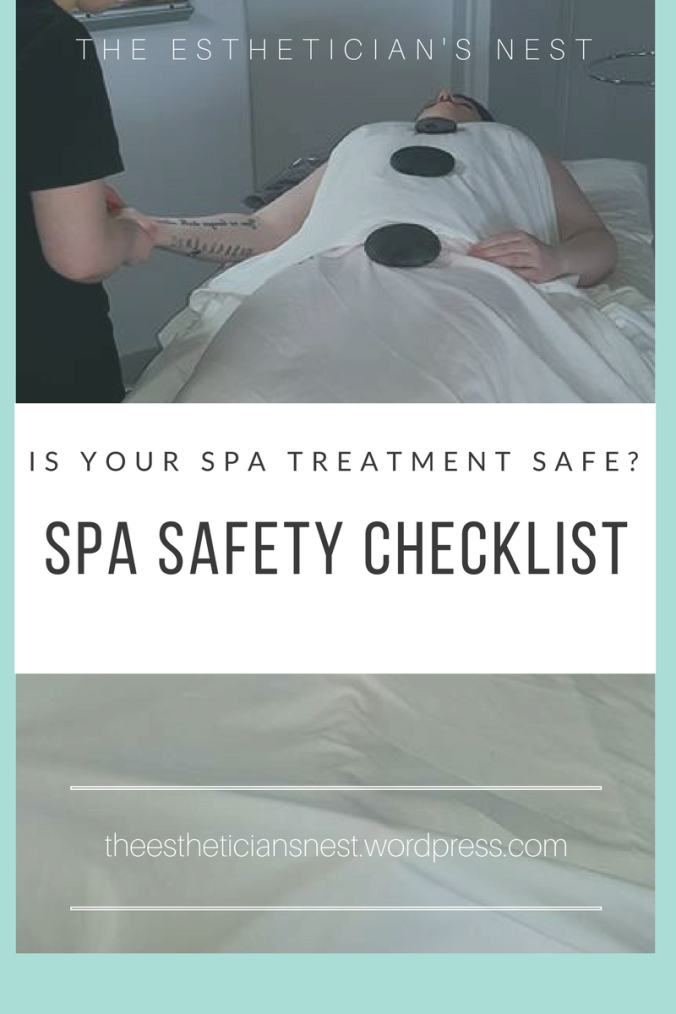
The weather is getting warmer and you are excited to dig out summer sandals but when you look down at your feet and see dry cracked skin and worn nail polish you decide to walk into a local nail bar for a pedicure. My question is, how can you know if this treatment will put you at risk for a serious infection?

We assume that all spas are following proper sanitation protocols but the reality is that it can be your own responsibility to know what to look for in a quality spa or salon establishment. To help you, I have created a checklist of basic health and safety procedures that must be followed to ensure your safety during a spa service.

spa safety

Depending where you live, the spa/salon industry will have a set of local health board regulated guidelines or rules to follow for decontamination but if you notice that the following checklist is not followed at your appointment, I strongly suggest you leave and book an appointment where you know they consider your health and safety a top priority.

√ Consultation form

You must fill out a client consultation form which asks you to list all health issues and medications. Even if you are in for a quick eyebrow wax you should be asked to fill this out as medications and certain disorders can be a contraindication and harm your skin if the treatment proceeds.

√ Disposable items

There are many items that must be thrown out after one time use; these items include gauze, cotton swabs, cardboard nail files, nail buffers, birchwood sticks, dremel/nail drill tips and wooden spatulas. If you see a dirty nail file on the station, ask for a new one.

√ No Double Dipping

During a waxing or sugaring service, the esthetician is not permitted to use the same spatula to dip into the hair removal product multiple times. Be sure to watch that this is the procedure during your service.

√ Gloves

Gloves do not have to be worn by spa professionals at all times but should be worn during services where blood spots could form such as with waxing or where the skin could be broken as with extractions during a facial or medical spa skin treatments. It is important to note that gloves do not replace hand washing and they must be new for each procedure.

√ Sterilization of tools

If you do not see the metal or plastic tools being sterilized, you should ask how it is done. Spas must be using either chemical (a liquid) or heat (an autoclave) for sterilization of metal tools; plastic tools can go in a chemical solution.


I hope this post will help you out so you can enjoy your next spa visit knowing that it will be a safe and beneficial experience that contributes to your overall wellness.

I welcome any questions or comments!

Have a beautiful day,

Melanie.